
Getting started
This guide builds a small registration form, publishes it, and adds a workflow that emails the respondent and adds each response to a Google Sheet. It takes about fifteen minutes on the free plan.
1. Create a form
Section titled “1. Create a form”Sign in at app.nextforms.com and click Create a new form. Give it a title; you can change it any time from the builder.
Every form starts with one page and no questions. The Builder tab is where you add them; Design is the theme.
2. Add questions
Section titled “2. Add questions”Click the + between cards and pick a type under Questions:
| Type | Use it for |
|---|---|
| Text Input | Names, free text, one line or many |
| Email, Phone, Website | Validated contact details. Phone includes a country-code picker |
| Country | A searchable list of countries |
| Multiple Choice | Dropdown, checkboxes or radio buttons, single or multiple answers |
| Yes/No | A single toggle, thumbs or buttons |
| Number, Rating | Numeric answers, currency and percent formats, star scales |
| Date | A date, or a date with a time |
| File Upload | Up to a configurable number and size of files |
| Calculated | A value computed from other answers, for totals and scores |
| Payment | A Stripe charge, fixed or calculated from answers |
Clicking a card opens its editor on the right: the question text, whether it’s required, helper text, and the settings for that type.
Side by side. Two short questions, like first and last name, can share a row. Drag one card next to the other and it snaps to half width.
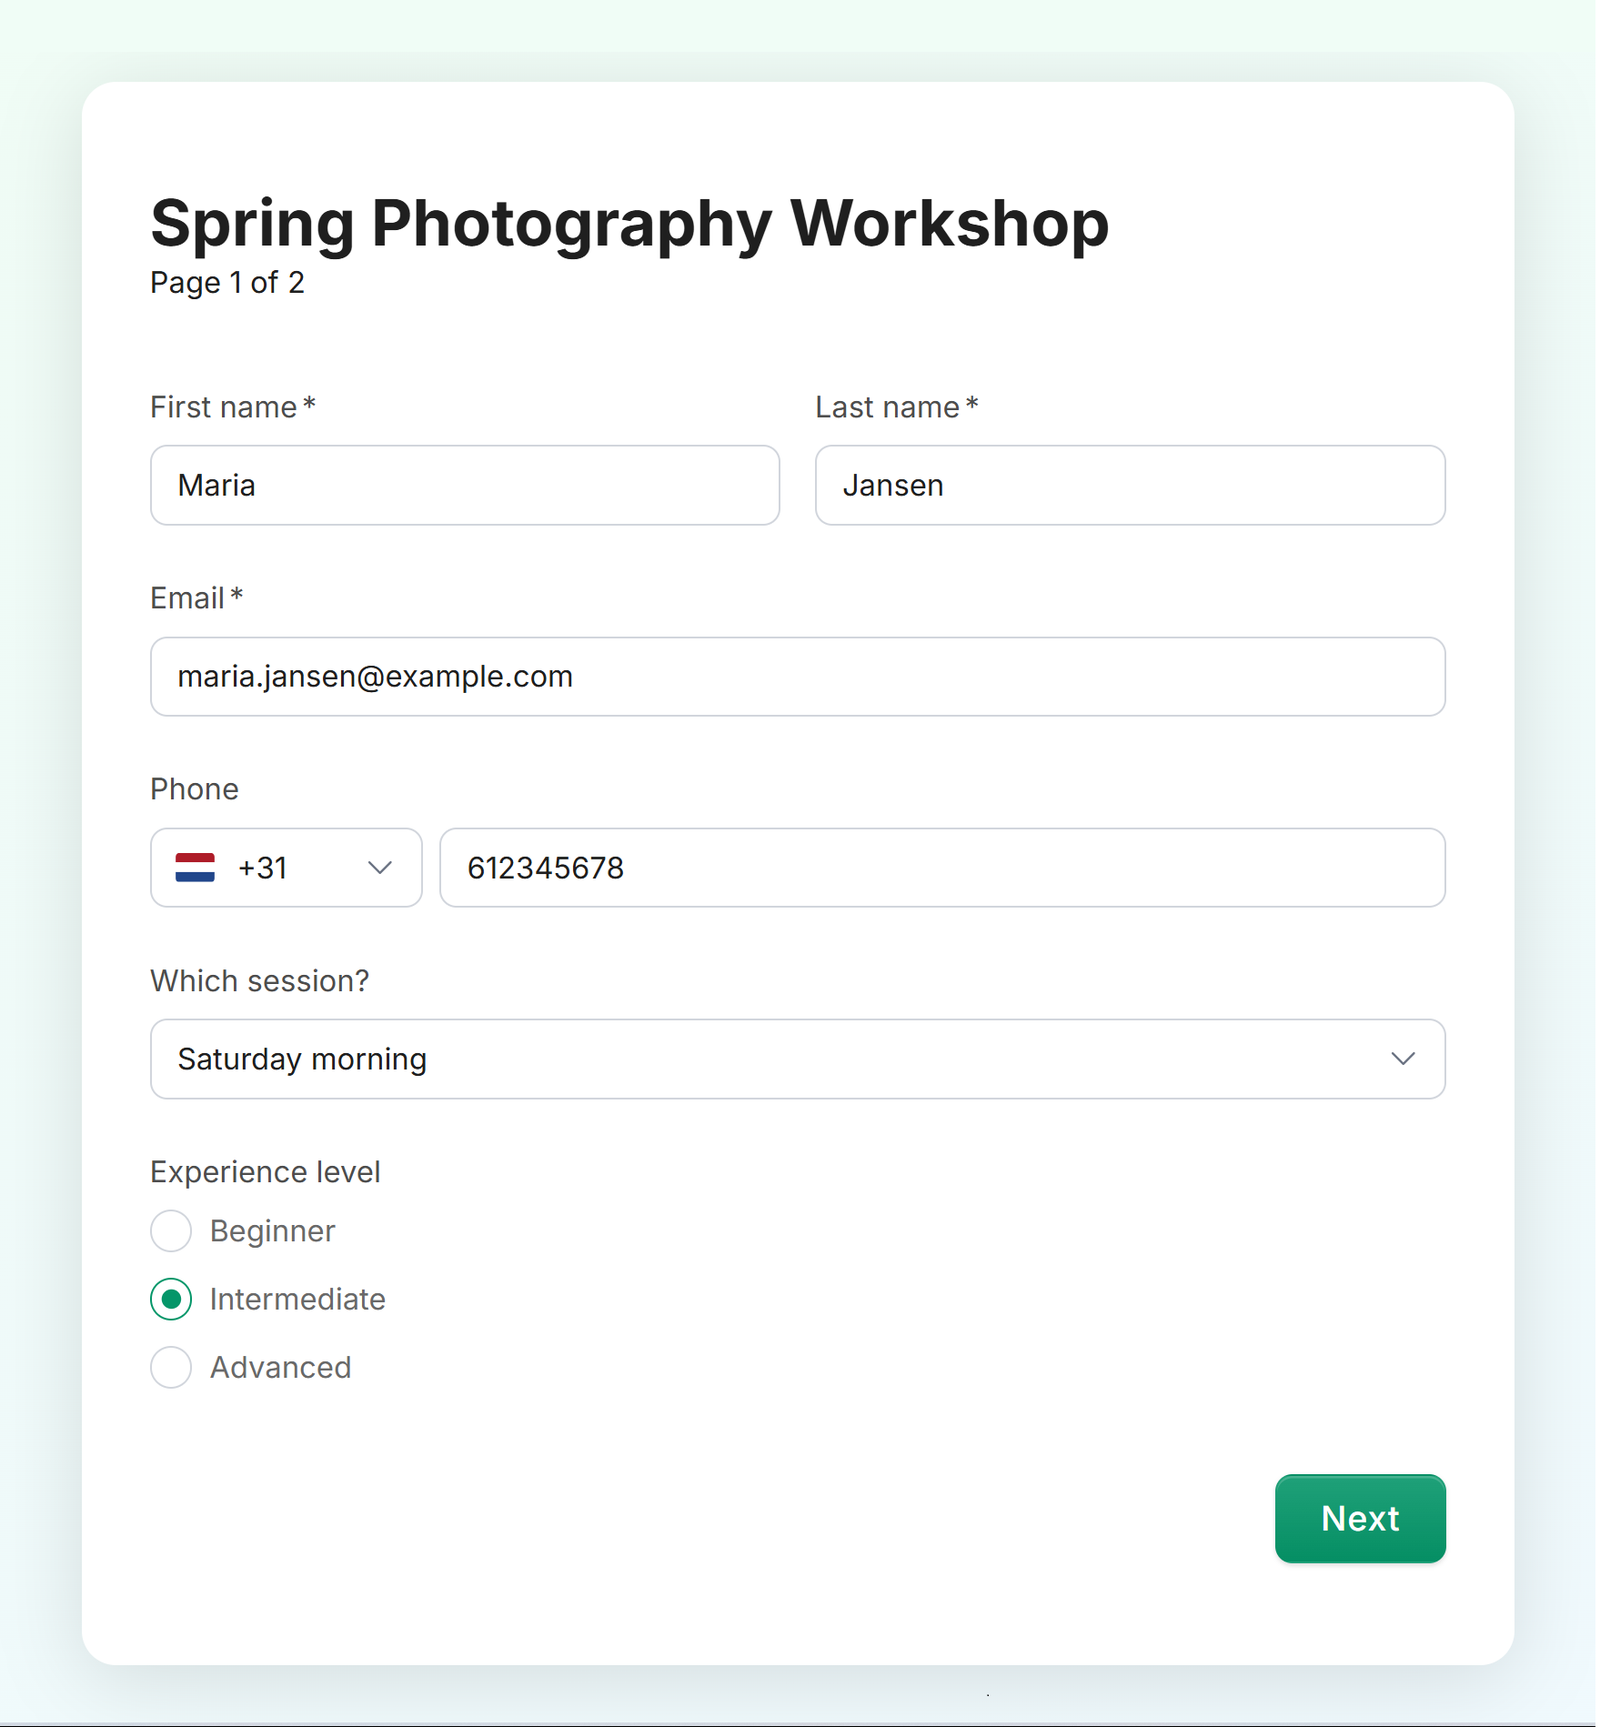
Pages. Long forms read better in steps. In the same + menu, under Structure, choose the page break to split the form at that point. Respondents get a “Page 1 of 2” indicator and a Next button.
3. Show a question only when it applies
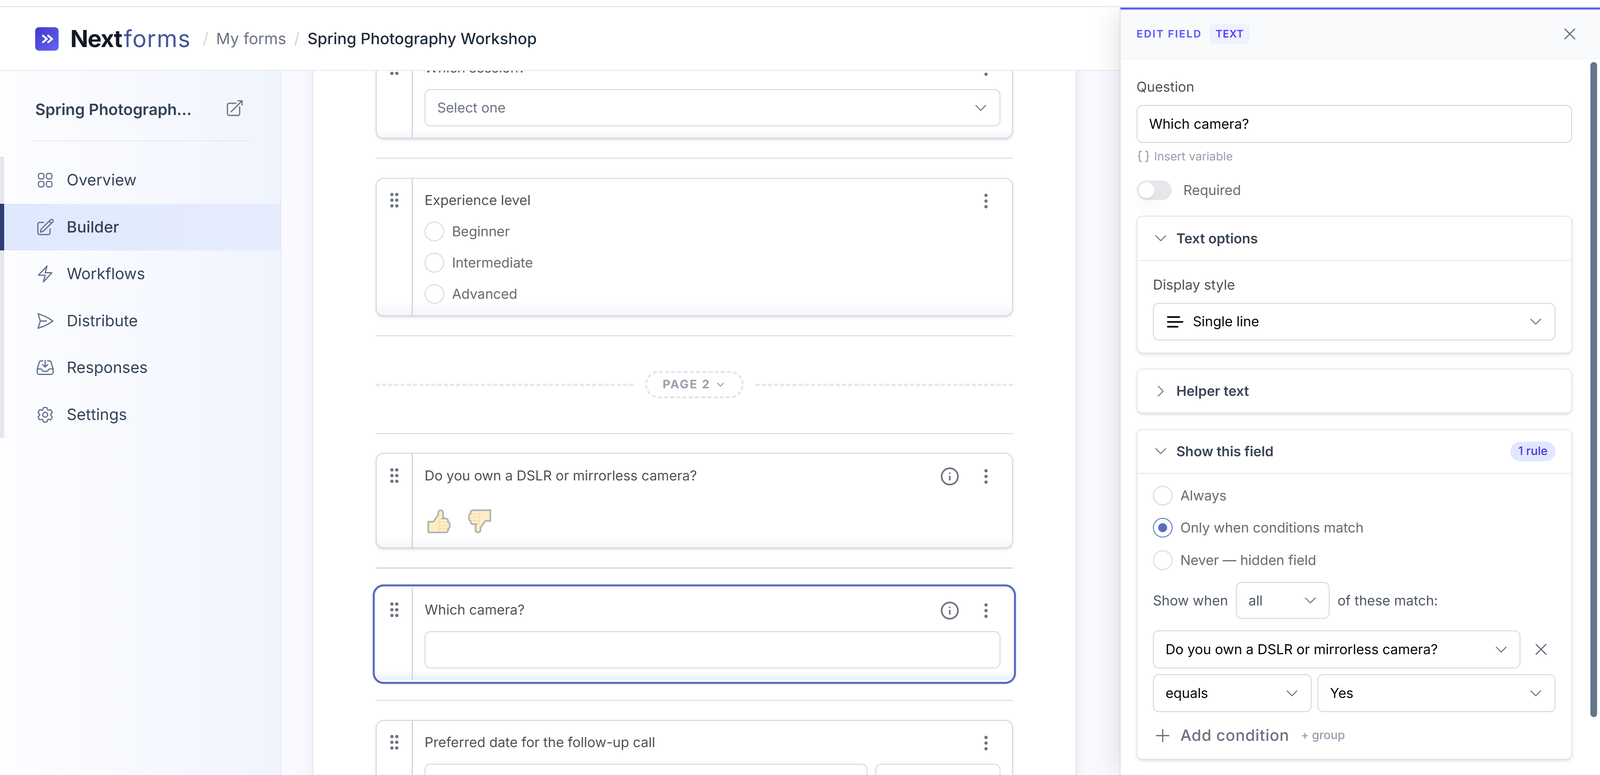
Section titled “3. Show a question only when it applies”Any question can be hidden until an earlier answer matches. In the question’s editor, open Show this field and choose Only when conditions match, then pick the question and the value to compare against.
In the example above, “Which camera?” only appears when “Do you own a DSLR or mirrorless camera?” is answered Yes. A hidden question is never required, so respondents are never asked to fill in something they can’t see.
Rules can be combined with all or any, and grouped. Date questions compare by day unless you give the rule a time.
4. Publish and share
Section titled “4. Publish and share”Click Publish at the top right. The first publish makes the form live; after that the button reads Publish changes whenever the draft differs from what respondents see, so you can edit freely and release when ready.
The Distribute tab has the form’s link, a QR code and the embed snippet. A published form looks like this to a respondent:
Use Preview at any time to fill the form in yourself without recording a response.
5. Read responses
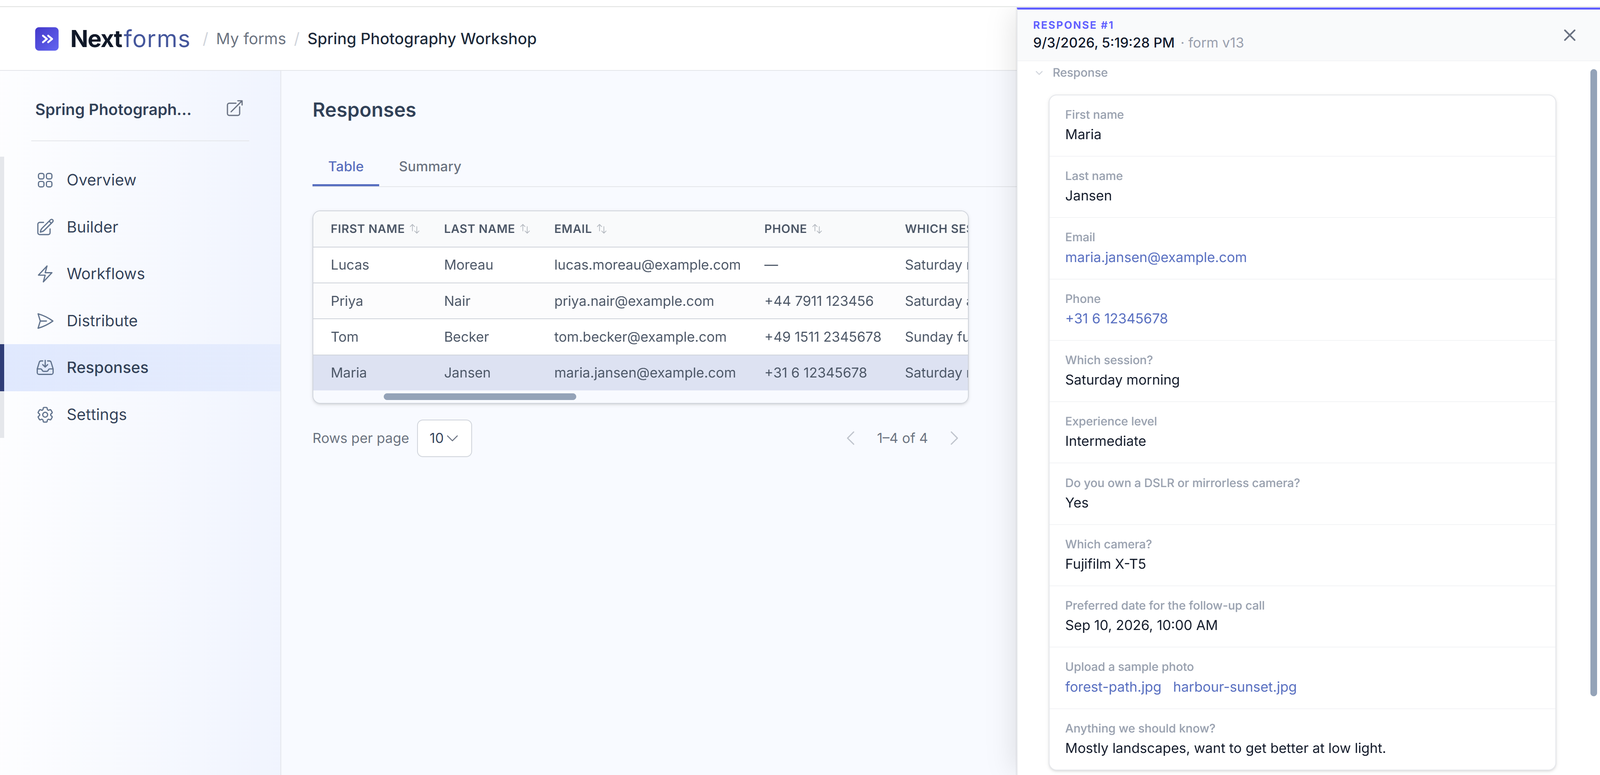
Section titled “5. Read responses”Every submission lands in Responses. The table shows one column per question and can be searched, sorted and exported to Excel. Click a row to open the full response, including uploaded files.
Responses are unlimited on every plan.
6. Run a workflow when someone submits
Section titled “6. Run a workflow when someone submits”A workflow is a set of steps that runs each time the form is submitted. Open the Workflows tab, click New workflow, and give it a name.
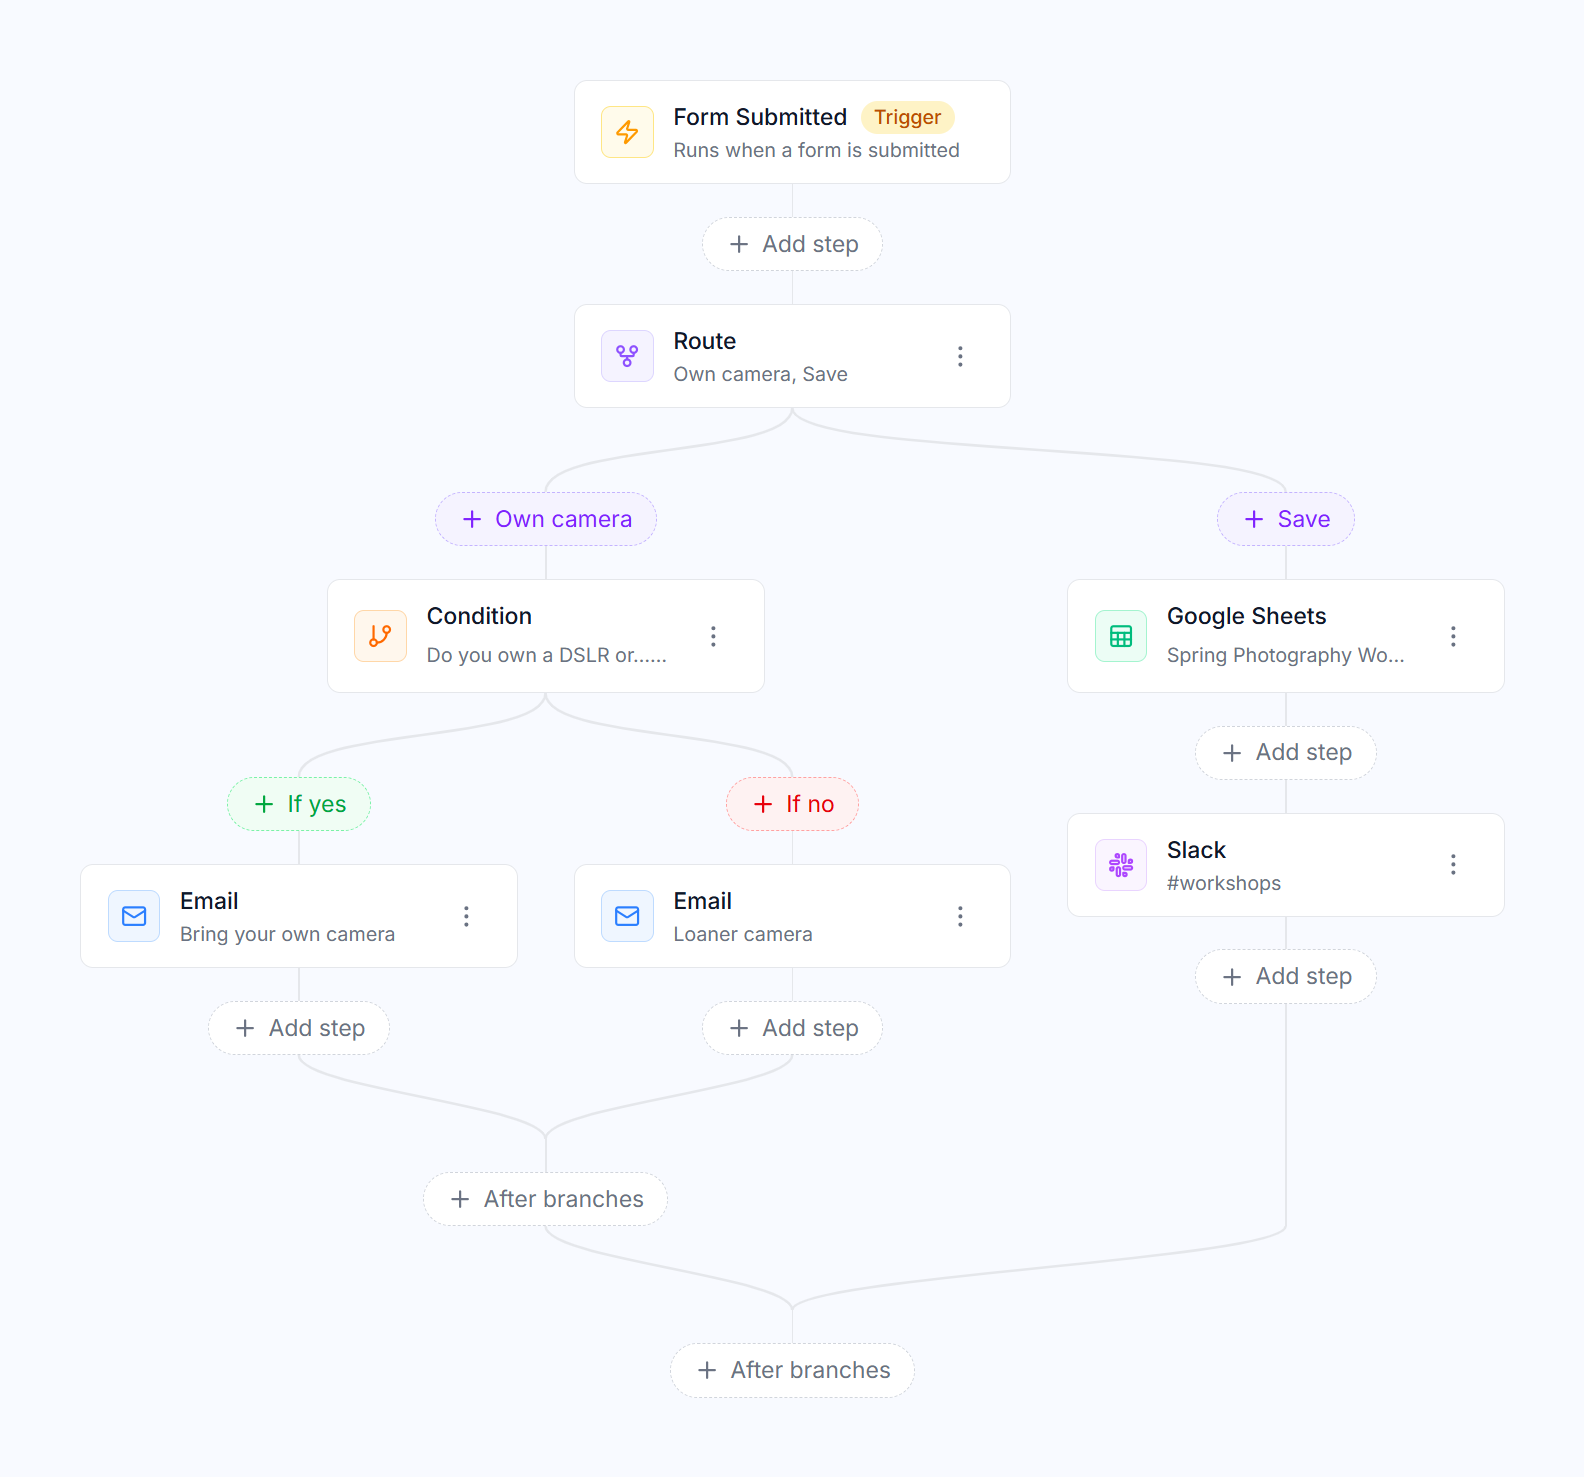
The canvas starts with the trigger, Form submitted. Click Add step below it to add:
- Email: send a message to the respondent, to your team, or to any address. Use the { } button in the subject and body to insert answers, the response number, or a link to the response.
- Condition: branch on an answer. Each branch gets its own steps.
- Route: run several branches in parallel, for example “notify the team” and “confirm to the respondent”.
- Google Sheets, Slack, Webhook: connect an account once under Integrations, then map answers to columns or a message.
- Approval (Pro): pause until someone on your team approves or declines, then continue on the matching branch.
Test it with the Test button. It runs the workflow against a sample response and shows every step’s result. Steps with side effects, like emails and Sheets rows, are mocked by default; you can switch any of them to run for real in the test dialog.
Publish the workflow when it does what you want. Like forms, a workflow has a draft and a published version, so you can edit a live workflow without affecting submissions until you publish again.
Each run appears under Runs with its steps, timings and any error, and every response shows which workflows ran for it.
Going further
Section titled “Going further”- Custom domains (Pro): serve forms on
forms.yourcompany.comwith short, readable links. - Email verification (Pro): respondents confirm their email address with a code before submitting.
Something missing? Email [email protected].